Policies
You manage access in FeatBit by creating policies and attaching them to IAM identities (users, groups of users) or FeatBit resources. A policy is an object in FeatBit that, when associated with an identity or resource, defines their permissions. FeatBit evaluates these policies when an IAM member makes a request. Permissions in the policies determine whether the request is allowed or denied.
Policy algorithm
FeatBit, by default, allows no access. Users need explicit permissions to access a feature.
Permissions are cumulative.
If an account member has one or more policies, then the account member’s access is defined by those policies. If the policies have conflicting permission levels, access is determined using a deny-override rule: if any policy explicitly denies a permission, that deny takes precedence over any allows from other policies. For example, if a member has one policy that allows access to a resource, and another policy that denies access to a resource, the member is denied to that resource.
If a group has one or more policies, then for each account member in the group, the account member’s access is defined by both the member’s policy and the policies assigned to the group.
For example, if a member has a Developer policy and is assigned another policy through their group, then the member will continue to have developer access to all resources through the developer policy, in addition to the access granted through their group.
The algorithm for determining whether a policy allows or denies access is as follows:
- If a statement within a policy explicitly denies access to a resource and action, access is denied. This statement overrides any other statement in the policy that allows access to the resource and action.
- If a statement within a policy explicitly allows access to a resource and action, and no statement denies access, access is allowed.
- If two different policies have conflicting permission levels, the least permissive level of access is applied.
- Any resource or action not specifically included within a policy is denied by default.
Statement order does not matter.
Control level (Resource types)
FeatBit policy now supports the following control levels (also called resource types):
- All, which controls if all resources are allowed or denied for members (or group of member).
- Workspace, which controls members' access to the workspace (including License and SSO).
- Organization, which controls members' access to the organization.
- IAM, which controls members' access to IAM.
- Access token, which controls members' access to access tokens.
- Relay Proxy, which controls members' access to the relay proxy.
- Project, which controls members' access to projects.
- Environment, which controls members' access to all environments.
- Feature flag, which controls members' access to feature flags.
- Segment, which controls members' access to segments.
Built-in policies
FeatBit provides three built-in policies which can't be modified. If needed, you can make a copy and modify it for your own needs.
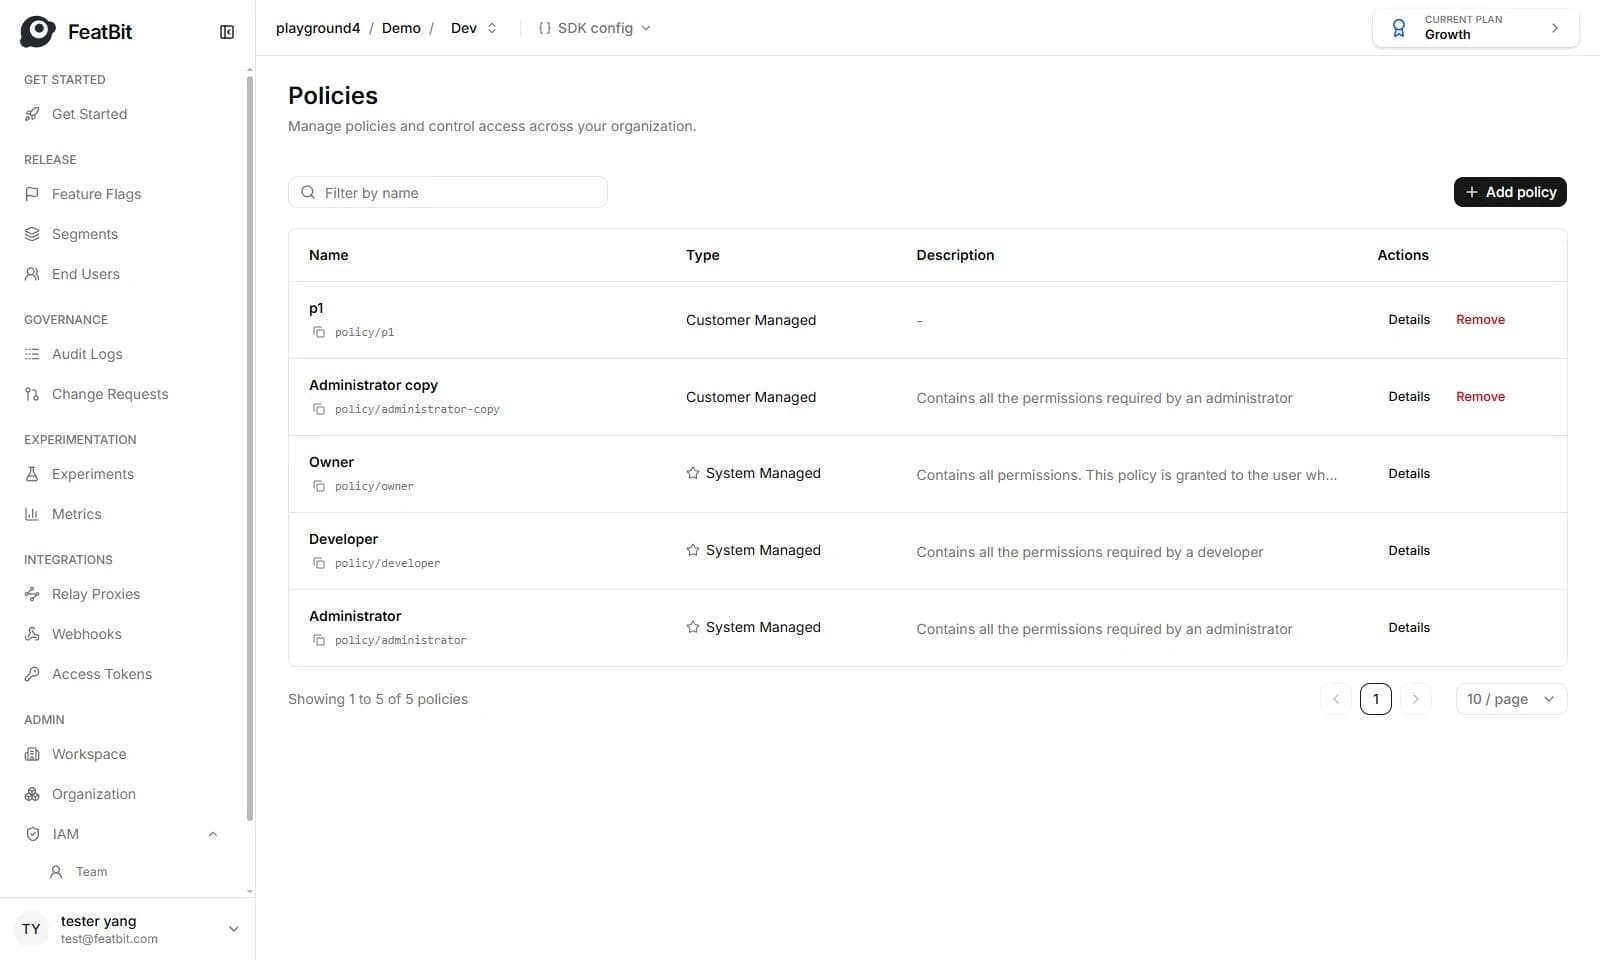
Create policy
-
Go to Policies page under the IAM section
-
Click Add policy button
-
In the Add policy drawer, input name, key and description of new policy.
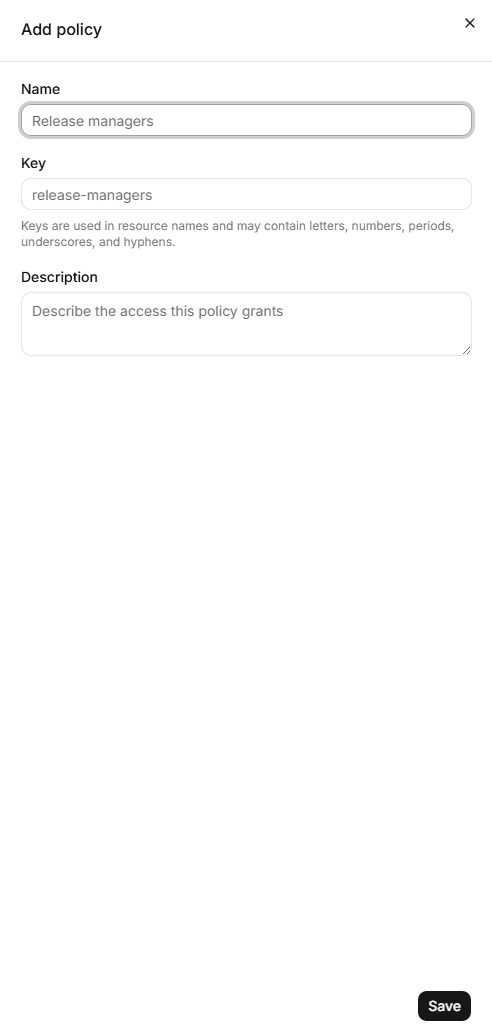
-
Then click Save button to create.
-
A new item is added to the policy list. You can filter policies by name to find the policy you just created.
-
Click on the policy you just created (or click on the Details action button). Go to the policy detail page.
Policy detail page
The policy detail page is composed of 6 parts:
- Name and Description of policy
- Type of policy (generated by the system)
- Resource Name
- Permission list, which can add, update and delete permissions of the policy
- Team, which can assign this policy to members or remove the policy from members
- Groups, which can assign this policy to groups or remove it from groups.
Add permissions
-
Click + Add permission button, a new empty permission form appears.
-
Choose the effect: allow.
-
Choose the control-level (resource type). If you want to control access permission of environment-level, choose
Environment -
Select the resources and actions you want to deny or allow.
- In resources selector, we choose project/demo:env/dev. It means the
devenvironment we want to assign access to belongs to projectdemo. You can choose multiple resources. - In actions selector, we choose
Access environments.
- Click Save changes. You can create multiple permissions in on policy.
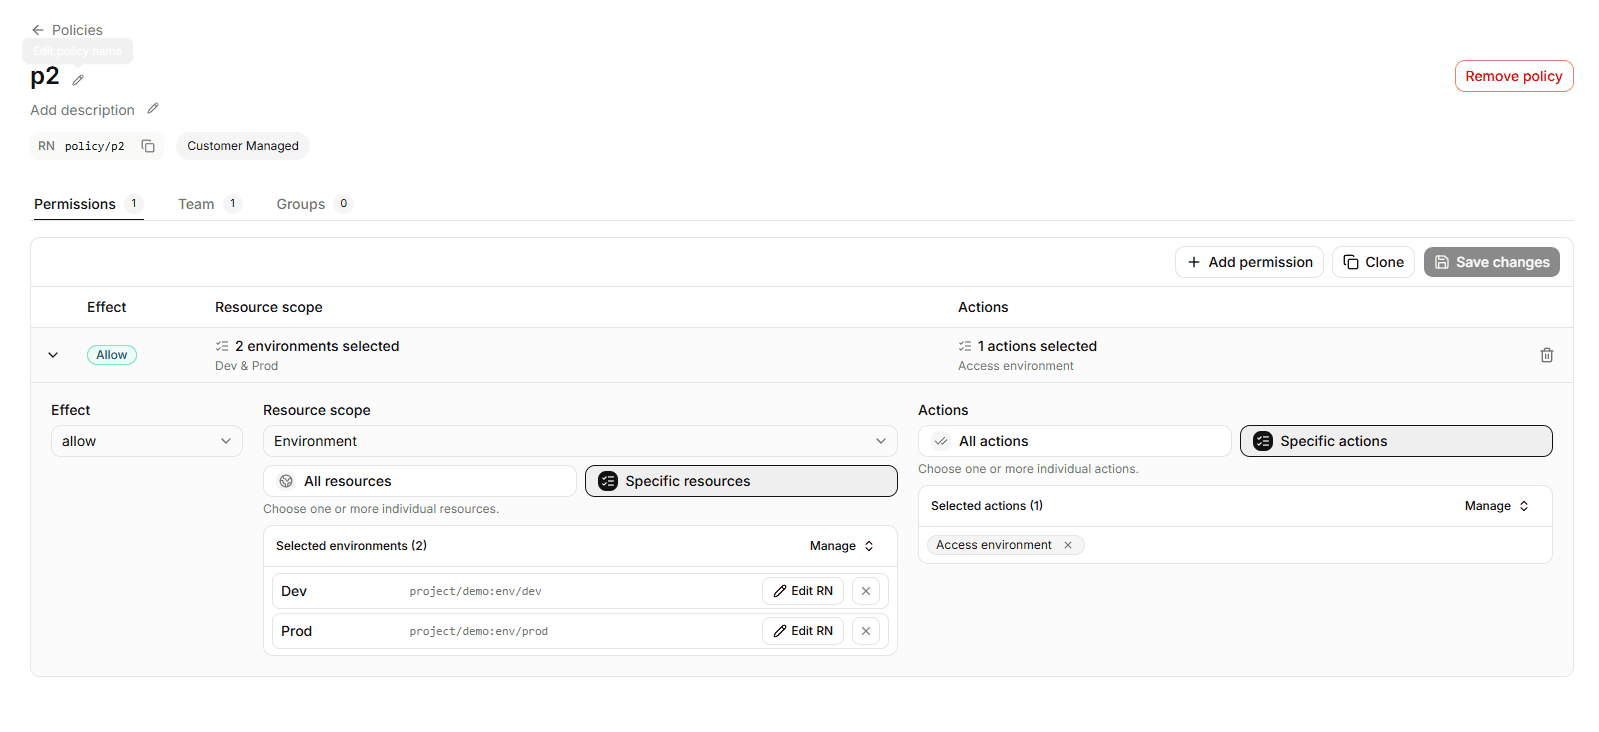
The permission above we created allows members who have this permission to access all resources in dev environment of project demo , but those members can't modify resources.
Each policy can add multiple permissions.
Remove permission
You can remove permission by clicking on the recycle bin icon button from permission list.
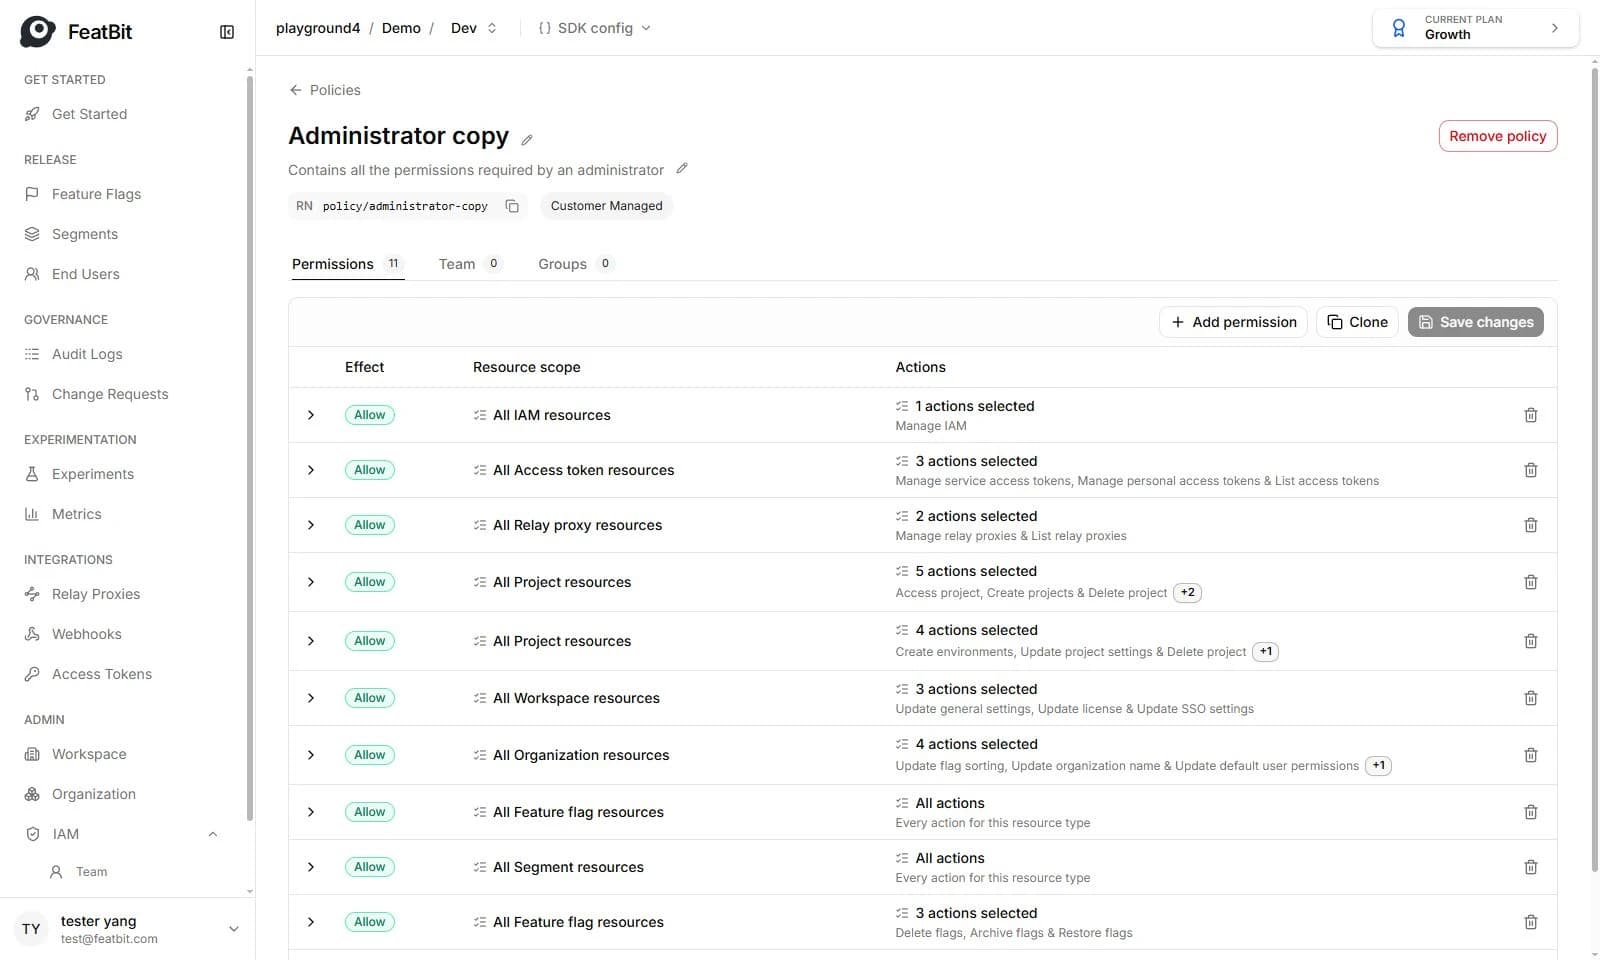
Assign permission to members
-
Go to policy detail page, switch to Team tab
-
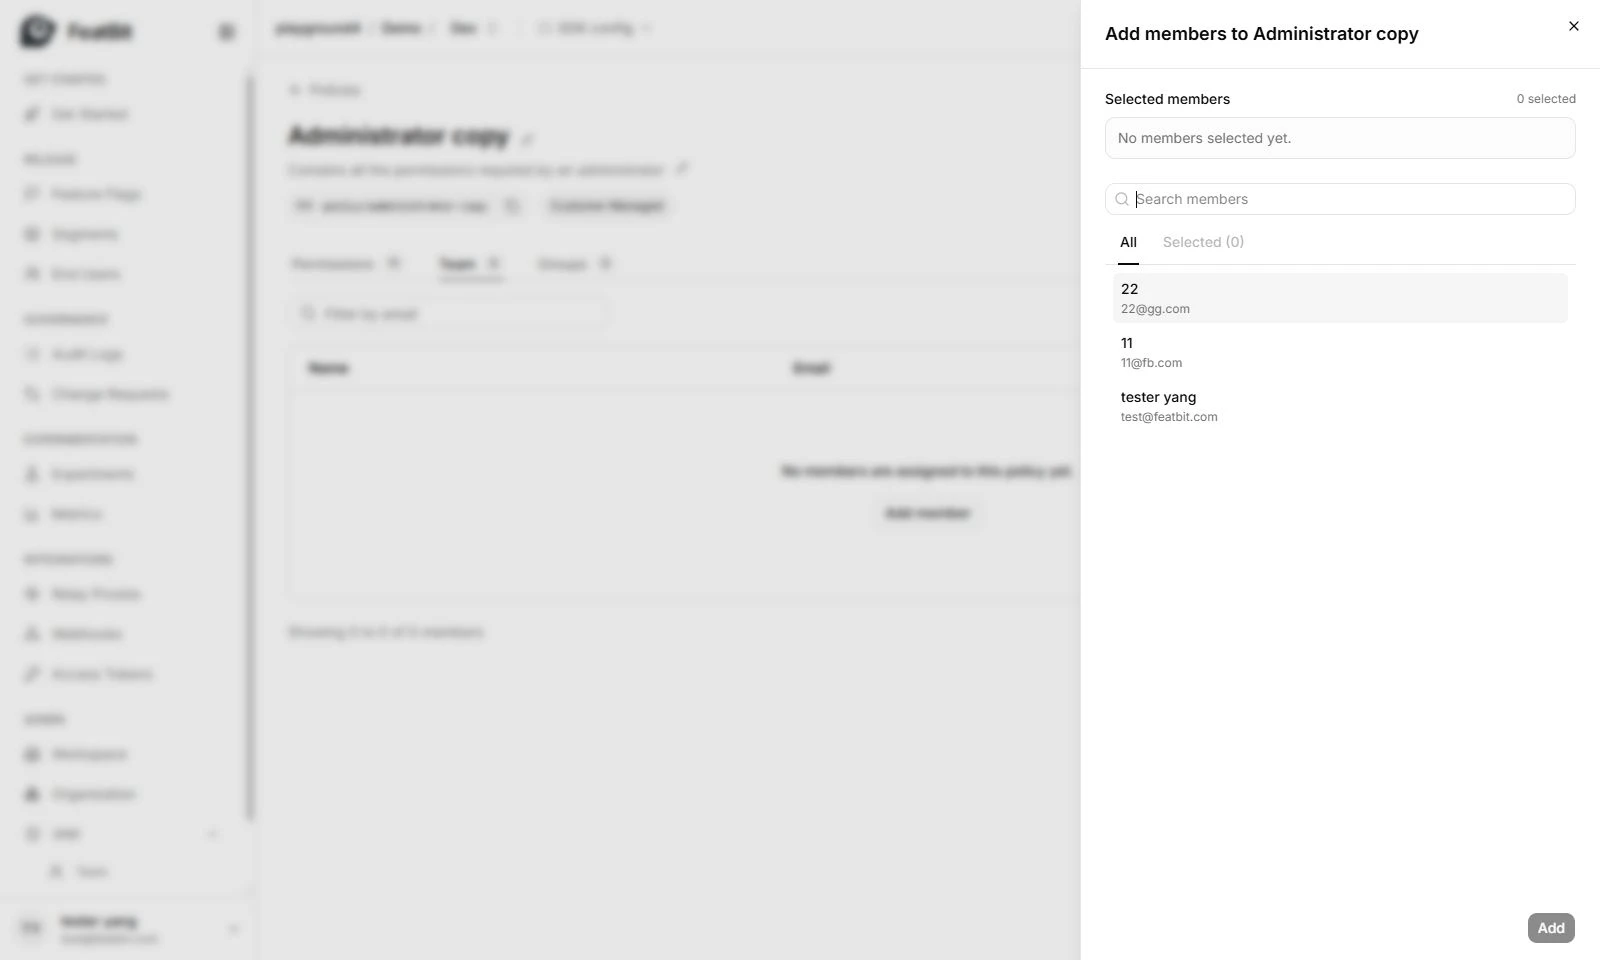
Click Add member button
-
Select the members, if too many members, you can filter with name or email
-
Click Add button.
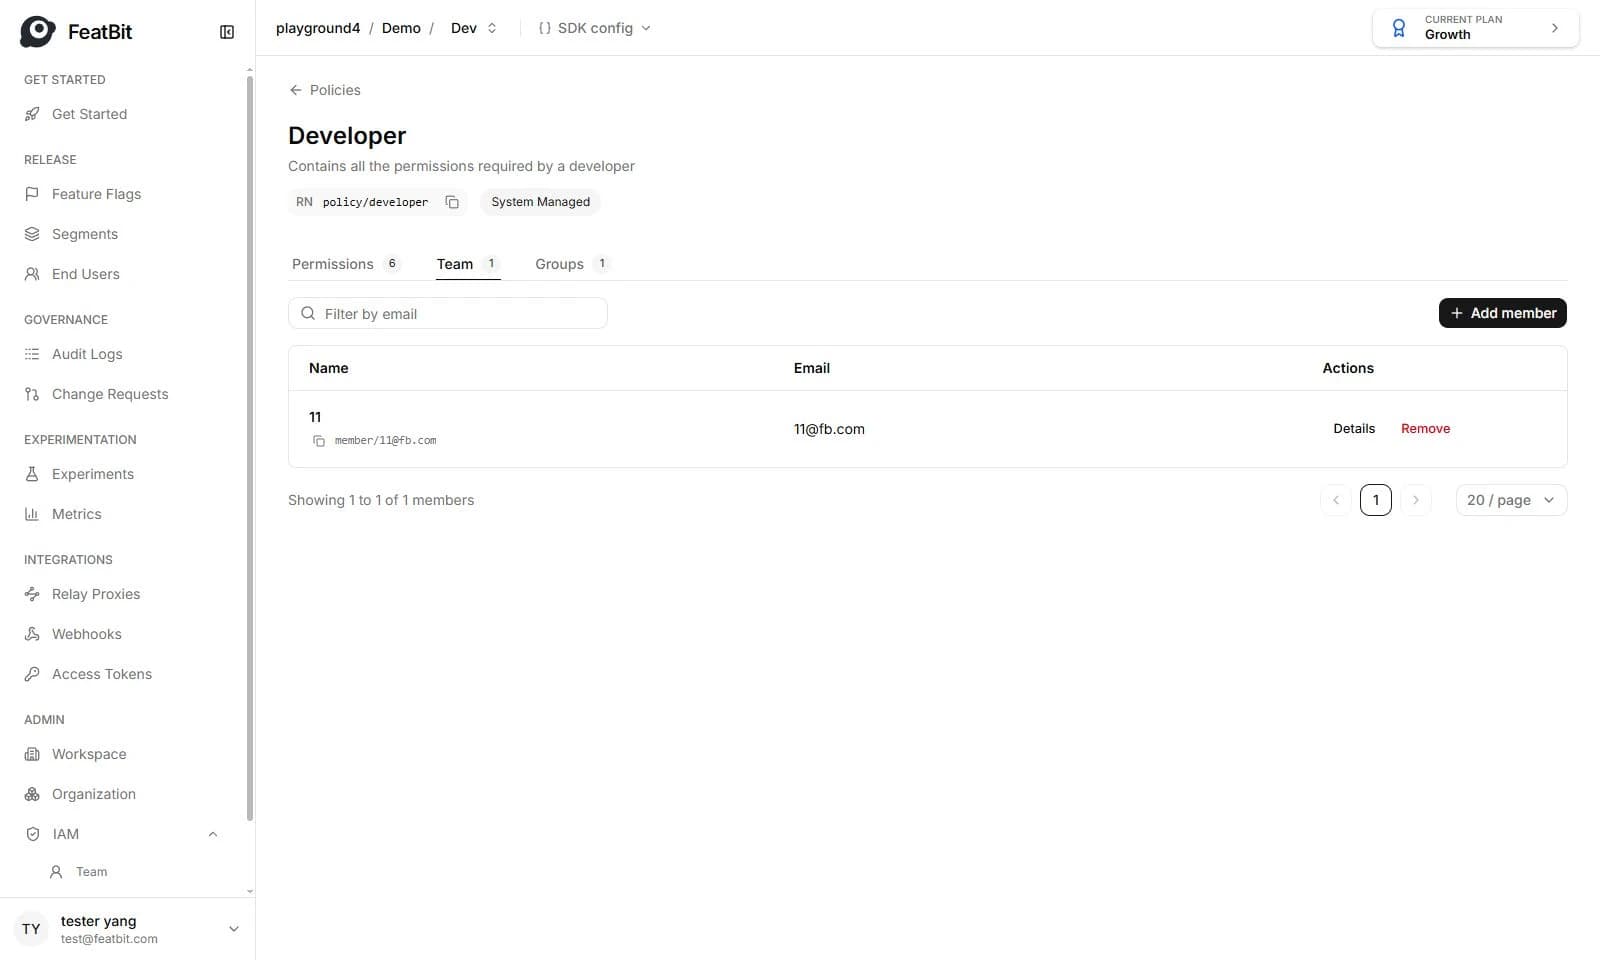
- Click the Remove button to remove members from the policy.
Assign permission to groups
-
Go to policy detail page, switch to Groups tab
-
Click Add to groups button
-
Select the groups, if too many groups, you can filter with name
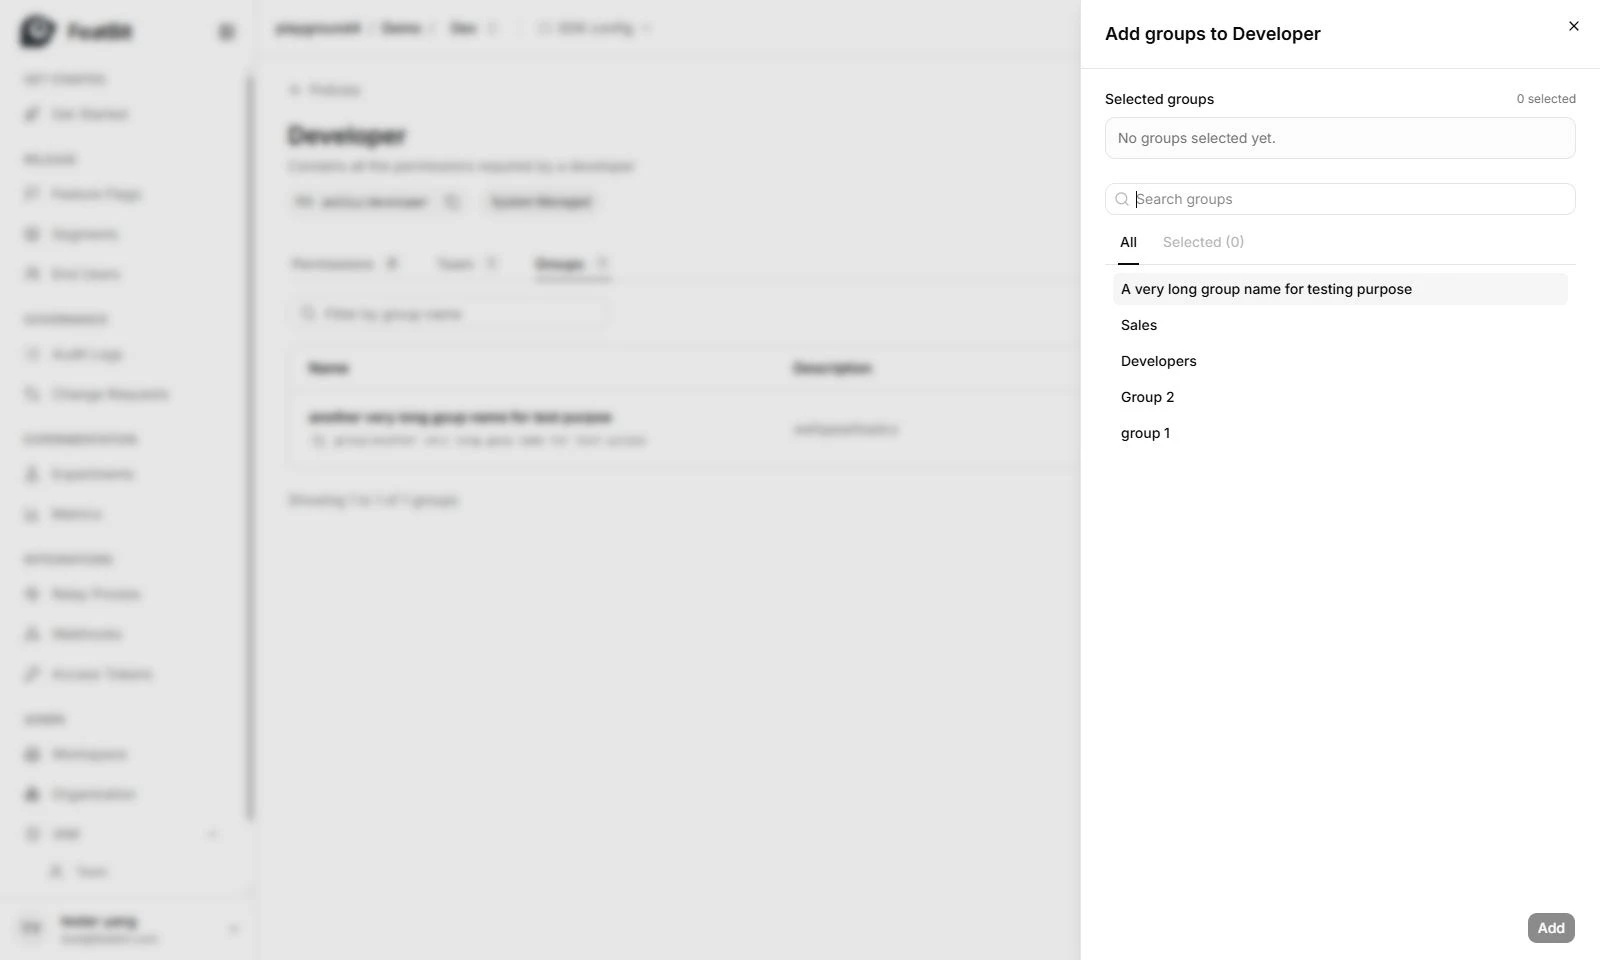
- Click Add button.
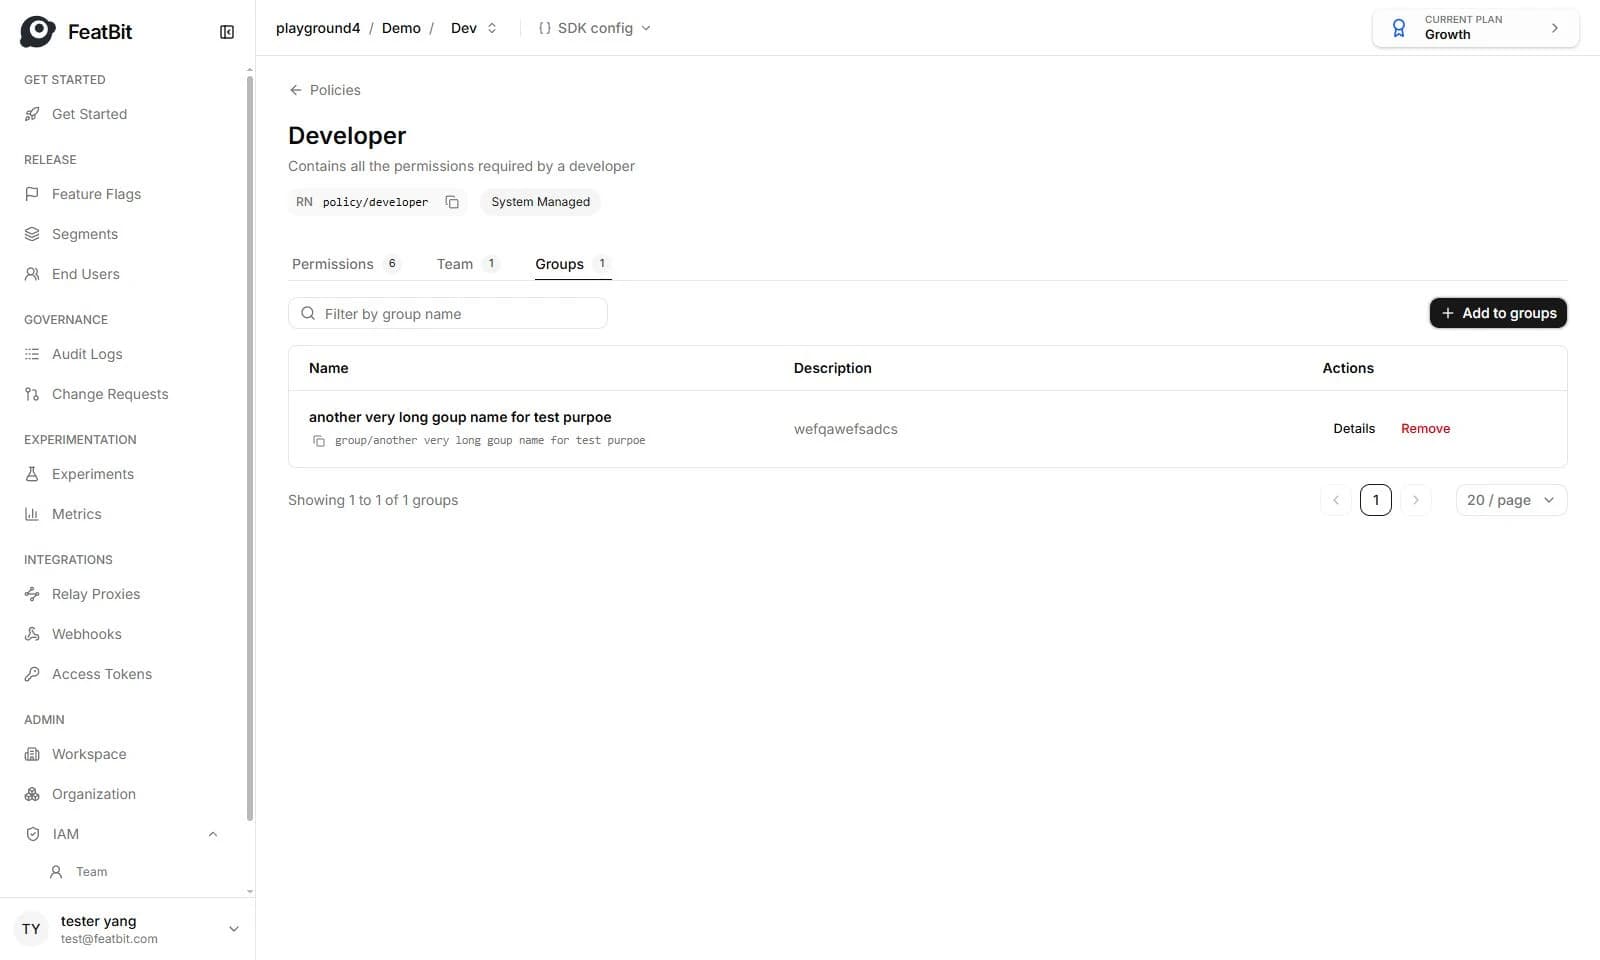
- Click the Remove button to remove groups from the policy.